Introduction
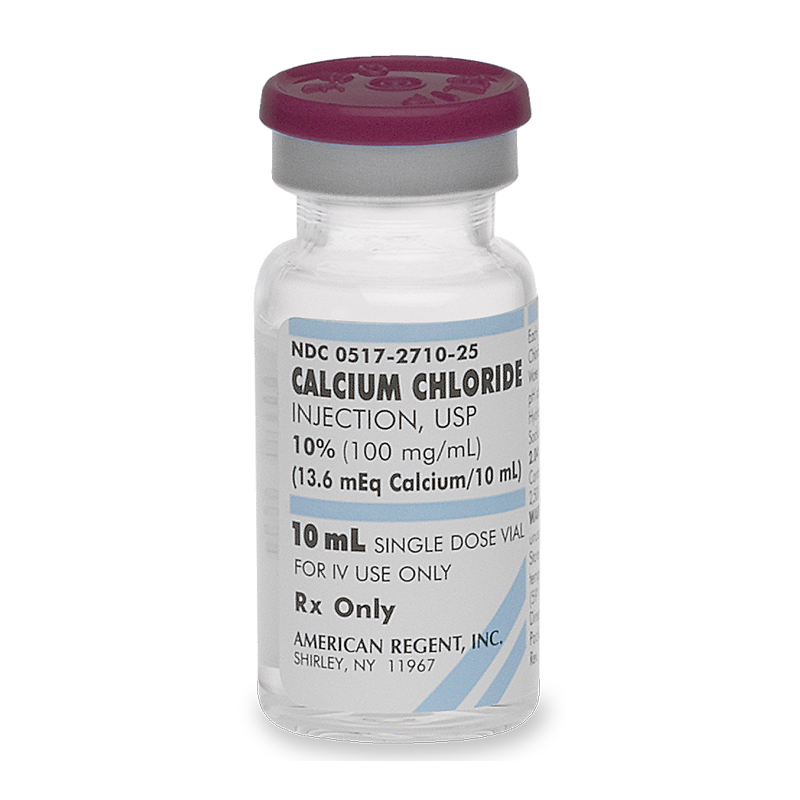
Calcium chloride (CaCl₂) is a simple, highly soluble calcium salt widely used in medicine, chemistry, and biology. In PRP therapy, a 10% calcium chloride solution is a clinically validated activator of platelets, triggering growth factor release by initiating the coagulation cascade. While calcium gluconate is preferred for intraarticular use, Autologous Thrombin Serum (ATS) is the superior activator for intramuscular and tendon PRP applications — and calcium chloride is the essential reagent used to produce it.
Calcium chloride plays a central role in preparing ATS from pre-isolated Platelet-Poor Plasma (PPP), functioning as a coagulant to induce clot formation. This clotting process allows thrombin-rich serum to be harvested and used to strongly activate LR-PRP prior to injection. This application is the primary focus for calcium chloride within the DIYPRP framework.
Why Is It Used in PRP?
Calcium chloride serves two critical roles in regenerative therapy workflows:
- Direct Platelet Activation: When calcium chloride is added to PRP, it reintroduces free calcium ions into a system previously anticoagulated with agents like ACD-A. This restores physiological ionic conditions and triggers the coagulation cascade. The result is controlled platelet activation, leading to the release of alpha granules containing PDGF, TGF-β, VEGF, and other growth factors. A light fibrin network forms, supporting retention of factors at the site.
- Preparation of Autologous Thrombin Serum (ATS): When calcium chloride is added to Platelet-Poor Plasma (PPP), it promotes coagulation and clot formation. During this clotting process, prothrombin in the plasma is converted to thrombin, which can be harvested in the supernatant as Autologous Thrombin Serum. ATS is a powerful activator used especially in LR-PRP protocols for muscular or tendon injuries, offering rapid growth factor release and strong fibrin matrix formation.
For ATS preparation, specific quantities of platelet-poor plasma (PPP) and 10% calcium chloride solution are mixed together maintaining a 1:10 CaCl₂:PPP ratio. The mixture is then allowed to sit for a short time and then spun in a centrifuge to isolate the thrombin-rich serum. This resulting serum can be collected from the supernatant for immediate use as an activator in LR-PRP preparations.
This dual utility, either as a direct platelet activator or as a clotting agent to generate ATS, makes calcium chloride uniquely versatile in the PRP workflow.
Practical Use
Calcium chloride is best suited for the following roles:
- Creating Autologous Thrombin Serum from PPP for later use in LR-PRP activations
- Topical fibrin-rich gels where clotting is desirable for wound adhesion
- PRP activation in controlled research environments where rapid degranulation is desired
It is not the ideal choice for intraarticular (IA) injections. For IA applications, calcium gluconate is better suited due to its slower release kinetics, which better match the biological repair timelines of low-vascular joint tissues.
Creating thrombin serum using calcium chloride is a more involved process but yields a more robust, fibrin-supported platelet activation ideal for intramuscular or tendinous PRP therapy.
Note: If ACD-A was used as the anticoagulant during PRP preparation, the calcium chloride dosage must be calculated carefully to ensure enough free calcium is available to overcome citrate binding. Insufficient calcium will result in incomplete activation or delayed clot formation.
Formulating a 10% Calcium Chloride Solution

READ BEFORE CONTINUING: Ensure that all glassware and stainless steel tools used including glass beakers, measuring spoons, scale cups, or any other item that comes into contact with any chemical or product is depyrogenated according to our Advanced Depyrogenation and Sterilization protocol.
Formulating a 10% calcium chloride solution is a straightforward but chemically sensitive process that requires accurate measurement and sterile technique. Anyone attempting to formulate calcium chloride for use in PRP systems, particularly when used to generate autologous thrombin serum, should possess a working knowledge of laboratory safety and handling procedures. This guide does not cover basic chemical hygiene or sterile lab practices, which are essential to avoid contamination.
All glassware used in the preparation of calcium chloride solutions, especially for clinical or regenerative use, should undergo dry heat depyrogenation at 250°C for at least 30 minutes to eliminate endotoxins. Sterile technique must be used throughout, and filtration through a 0.22 µm sterile filter is mandatory to reduce microbial risk.
Final Concentration:
- 10% (w/v) = 100 g/L
Note: If using anhydrous CaCl₂, the equivalent concentration for 10% w/v is approximately 73 g/L.
Required Materials and Equipment:
- Sterile Gloves
- Use: Sterile gloves for handling sterile components.
- Surgical Mask
- Use: Maintain sterility of workspace.
- 20 mL Luer Lock Syringe
- Use: Preparing the calcium chloride solution by mixing sterile water.
- 25 x 0.70 mm (22G x 1) Needle
- Use: Extracting sterile water from ampules.
- pH Test Strips
- Use: Verifying the pH level of the prepared calcium chloride solution.
- 50 mL Glass Beaker
- Use: Mixing all constituent components.
- Teaspoon
- Use: Transferring chemicals.
- Analytical Scale
- Use: Weighing all constituent components.
- Note: Requires accuracy to 0.001 grams.
- USP Grade Calcium Chloride Dihydrate (CaCl₂·2H₂O)
- Use: Active component
- 40 mL of Sterile Water for Injection
- Use: Preparing the calcium chloride solution and priming the syringe filter.
- Glass Stir Rod
- Use: Stirring the contents in the beaker to a homogeneous mixture.
- 30 mm Sterile Syringe Filter, PES Membrane, 0.22 Microns
- Use: Filtering and sterilizing the calcium chloride solution before adding it to the sterile 30 mL vial.
- Note: A 0.22 µm filter is sufficient to remove bacteria and particulates, but does not eliminate cytotoxins, endotoxins, or pyrogens. For in vivo applications, a polyethersulfone (PES) membrane is typically used due to its biocompatibility and low protein-binding properties. Glassware and chemicals must be sterile.
- 25 x 0.70 mm (22G x 1) Needle
- Use: Filling the calcium chloride vial with the sterilized calcium chloride solution.
- Sterile Wipe
- Use: Cleaning the calcium chloride vial’s rubber stopper before adding the solution.
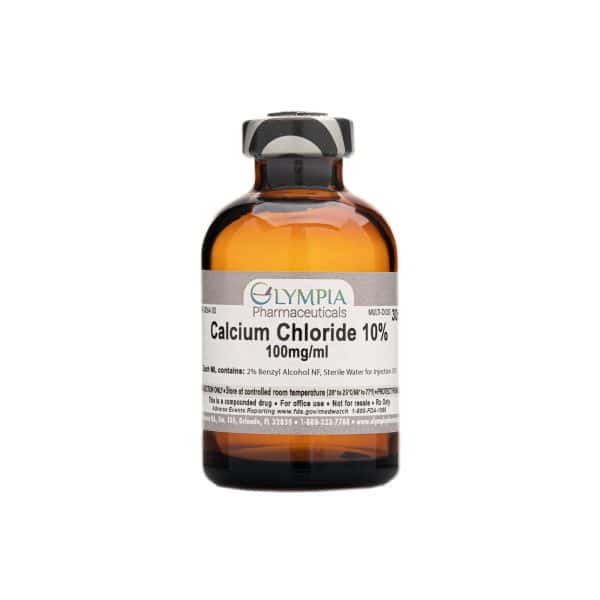
- Calcium Chloride Storage Vial, 30 mL
- Use: Storing the 10% calcium chloride solution.
- Note: The vial must be sterilized and free of cytotoxins, endotoxins, and pyrogens. Use proper sterilization techniques.
Instructions:
Note: All glassware used should be properly sterilized beforehand via dry heat depyrogenation at 250°C for thirty minutes prior to use.
- Weigh 3.0 grams of Calcium Chloride Dihydrate, and add to the beaker.
- Prime the 20 mL syringe by actuating the plunger a couple times. This will help free up the plunger.
- Proceed to use the 22G needle to draw out 30 mL of sterile water from the ampules and add this water to the beaker.
- Note: Sterile water is preferred as it’s free of cytotoxins, endotoxins, and pyrogens that could cause an adverse reaction for in vivo use.
- Once the water has been added, stir the mixture well into a homogenous solution. Some crystals will remain on the bottom and may be crushed up with the end of the stir rod.
- Note: This mixture creates a slightly exothermic reaction and the solution will heat.
- Use a pH meter to measure the pH of the solution. The expected pH of a freshly prepared 10% CaCl₂ solution (w/v) typically ranges from 5.5 to 7.5. Ideal is about 6.0 pH.
- Note: Drop some of the solution onto the test strip rather than dipping the test strip into the solution, to prevent contamination.
- Use the sterile wipe to sanitize the rubber stopper of the 30 mL storage vial.
- Prepare the syringe filter by attaching it to a sterile 22G needle, being careful not to contaminate the sterile side of the filter.
- Using the remaining 10 mL ampule of sterile water, draw the water into a 20 mL syringe. Use this water to prime the sterile filter by pushing it through the filter into a discard container. This step ensures that any loose fibers or particulates on the sterile side of the filter are flushed out and do not contaminate the final solution.
- Cap the sterile needle/filter assembly and disconnect from the syringe. Set aside.
- Using the 20 mL syringe, draw up the 10% calcium chloride solution from the beaker. Note that 10 mL of the solution will remain in the beaker and will need to be processed in a subsequent step.
- Attach the sterile needle/filter assembly to the 20 mL syringe and proceed to fill the 30 mL vial with the 10% calcium chloride solution.
- Once the 20 mL syringe is empty, disconnect the syringe from the needle/filter assembly, leaving the assembly in the rubber stopper of the vial.
- Draw up the remaining 10% calcium chloride solution from the beaker using the syringe. Reattach the syringe to the needle/filter assembly without removing it from the rubber stopper, and fill the vial with the remainder of the solution.
- Ensure the solution in the vial is clear and free of particles.
- Clean the vial and label vial with the contents and the date of formulation.
Storage and Shelf Life
- Store in a sterile, airtight glass vial or polypropylene container
- Keep at room temperature (15–25°C)
- Protect from moisture — calcium chloride is highly hygroscopic
- Use within 30 days
Can I Use PA-Grade Calcium Chloride?
For topical or ex vivo use, you can prepare 10% CaCl₂ from P.A. (analytical grade) powder, if:
- You use distilled or WFI-grade water
- You filter the final solution through a 0.22 µm sterile filter
- You perform dry heat depyrogenation by baking all glassware at 250°C for 30+ minutes to destroy endotoxins
However, USP-grade calcium chloride is strongly recommended over PA-grade for any preparation intended for human injection.
DIYPRP Guidance
In the DIYPRP system, 10% calcium chloride is used primarily to generate Autologous Thrombin Serum (ATS) from pre-isolated PPP. This serum can then be used to strongly activate LR-PRP preparations for intramuscular or tendon applications. It offers superior activation compared to calcium alone, but requires more processing time.
For intraarticular PRP injections, the preferred activator is calcium gluconate, which offers a slower and more sustained activation profile suitable for the low-vascular environment of joint spaces.
Notes on ACD-A Interaction
If you use ACD-A anticoagulant, remember that it chelates free calcium. The calcium chloride you add must surpass the citrate’s binding capacity to activate platelets. This is why timing and dose are essential, you must mix just before injection or clot formation to avoid premature activation or failure to activate.
References
- Everts, P. A., et al. (2006). “Platelet-rich plasma and platelet gel: a review.” Journal of Extra-Corporeal Technology, 38(2), 174–187.
– Discusses mechanisms of platelet activation, including calcium chloride-induced degranulation and coagulation cascade initiation. - Mishra, A., et al. (2014). “Platelet-rich plasma in orthopedic applications: evidence-based recommendations for treatment.” Journal of the American Academy of Orthopaedic Surgeons, 22(18), 469–470.
– Outlines PRP applications in tendon and muscle injuries and the importance of controlled activation. - Xie, X., et al. (2014). “Comparison of different platelet-rich plasma formulations in the treatment of knee osteoarthritis: a randomized clinical trial.” American Journal of Sports Medicine, 42(8), 1952–1960.
– Compares outcomes of PRP with different activation strategies. - Anitua, E., et al. (2004). “Autologous platelets as a source of proteins for healing and tissue regeneration.” Thrombosis and Haemostasis, 91(1), 4–15.
– Details gradual growth factor release and use of CaCl₂ in platelet activation. - Marx, R. E. (2004). “Platelet-rich plasma: evidence to support its use.” Journal of Oral and Maxillofacial Surgery, 62(4), 489–496.
– Supports the clinical use of calcium chloride in creating autologous thrombin and enhancing tissue adhesion. - Sundman, E. A., et al. (2011). “The anti-inflammatory and matrix restorative mechanisms of platelet-rich plasma in osteoarthritis.” American Journal of Sports Medicine, 39(11), 2362–2369.
– Indicates relevance of delayed activation for intraarticular PRP and the effect of fibrin density. - Drago, L., et al. (2013). “Platelet-rich plasma for the treatment of orthopedic infections: an in vitro study.” PLoS ONE, 8(9), e73863.
– Demonstrates calcium chloride’s compatibility with sterile and injectable applications. - Takikawa, M., et al. (2011). “Enhanced effect of platelet-rich plasma containing a new carrier on hair growth.” Dermatologic Surgery, 37(12), 1721–1729.
– Explains calcium chloride-induced thrombin generation in PPP for enriched serum production. - Blajchman, M. A. (1997). “Immunomodulation and blood transfusion.” American Journal of Therapeutics, 4(5-6), 343–348.
– Provides safety insight on storage and preparation considerations, including sterility and pyrogen control.


Leave a Reply